Monday 28 November 2011

Instructions for December World Events task

Presenting Information
Task sheet

You will be provided with a list of some events, with brief descriptions, taking place around the world during December. You may know of some more and may like to include those too or share them with colleagues.

1. Consider ways to make this list more attractive and so more likely to be read and have some impact. Find a more suitable graphic or image to accompany or illustrate the events that you feature in your display. The text provided needs to be included somewhere in your document or publication to describe each event in brief.

2. Choose any application that you wish to utilise for this purpose. Here are some possible displays:

  • A calendar page using a table with illustrations 
  • A spreadsheet or presentation slide with links that take viewers to another sheet or slide with more information 
  • A blog with an entry for each event 
  • A more attractive text and image document or leaflet (eg Word, Publisher or Serif PagePlus) 
  • An A4 poster (eg using Serif DrawPlus) 

3. Where possible, add links to web sites with more information in addition to the brief description provided on your sheet. This could simply be a link to the site where you obtained your image. A note of where each image’s original location should be kept and this information either incorporated in the main document or publication itself or as supplementary notes.

For the purpose of the first part of this task, it will be acceptable to use images that are not licensed for commercial use or re-use except where you are including them in a blog or a web site or storing them (or the publication) on-line.

4. As an extension to this task you could consider revising your draft publication to be suitable for distribution or publishing on-line.

This would necessitate using only images for which you are confident an appropriately license applies (or for which you have permission to use).

Replace images accordingly, including revised notes of where the replacements have been obtained.

Sample output:
An attractive display of World Events in December

A list of images sources

A revised display suitable for general distribution or publication on-line

A revised list of image sources


December events


Here are some events happening around the world in December. Your task is to create an attractive display of these, using images and setting out the text to get people’s interest.

2 DECEMBER
Where Abu Dhabi, United Arab Emirates
What The city will be decked out in shades of red, white and green as the United Arab Emirates marks its 40th National Day. Expect flags and fireworks galore.
When 2 December

3 DECEMBER
Where Paternoster, South Africa
What Feast on shellfish as the West Coast village holds its Crayfish and Seafood Festival. There will be a beer garden, plus lots of arts and crafts stalls.
When 3-4 December

4 DECEMBER
Where Angkor Wat, Cambodia
What The speediest way of seeing the World Heritage Site is the Angkor Wat International Half Marathon: the route takes competitors past temples and through jungle to raise money for landmine victims.
When 4 December

10 DECEMBER
Where Jodhpur, India
What As part of the international British Polo Day, a series of chukkas will be taking place at Maharaja of Jodhpur's Private Polo Club, including the famous Cavalry v Guards elephant polo match. The event culminates with a gala dinner.
When 10-11 December

17 DECEMBER
Where Alyeska, Alaska
What To celebrate the winter solstice, the Alaskan ski resort of Alyeska lights up during its annual Winter Solfest event. Visitors can warm up with bonfires, food, live performances, and ski and snowboarding events. See www.alyeskaresort.com
When 17-19 December

26 DECEMBER
Where Moscow, Russia
What Wrap up warm and enjoy a troika ride or listen to folk bands perform in Izmailovo Park during Moscow's Winter Festival.
When 26 Dec-8 Jan

Add any more (End of term??!) that you may know about.

Sunday 27 November 2011

Dexcember World Events [sample images]


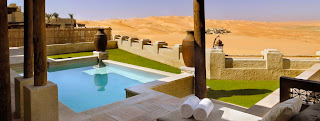
Abu Dhabi


crayfish and lobster


Running in the half-marathon in Angor Wat


Polo in India


Winter Solfest logo


Moscow


Christmas!

[Note: None of these images are licensed for commercial use]


Saturday 19 November 2011

Brief for Task 2B (Alice)

Brief for
Alice In Wonderland task 2B
Use the A5 landscape document created in Task 2A.

A first page should be added, featuring only the title Alice In Wonderland in a font at least size 72. The title should not extend over the page and the word Wonderland must not be split.

A font size should be chosen for the main text so that, after the amendments below, it occupies 4 pages, making the whole document 5 pages.

The four images, one of which must be included in Task 2B, are provided on-line.


alice-white rabbit


alice-alice1


alice-alice2

alice-caterpillar

Each page (other than the first) should feature at least one image.

The graphics which must be included in Task 2B are the four maths symbols. These can be created with shapes or images obtained from other sources. They need to be placed behind text or other images and with colours or shades that allow the text to be reasonably clear.

+ - x ÷

The title Alice In Wonderland should be featured in a header on all pages except the first.

Your name and a page number should be featured in a footer on all pages except the first. The page number should be placed near the bottom right of the page and start with 1.

Assignment 2 Guide (Alice)

These guidance notes cover one way to meet the Pass requirements for the Alice task.

Open the text file. It has 6 fairly obvious errors which need to be corrected. Spellcheck should handle them OK.
This text can then be used in whichever application you choose to use. These notes are for Word.

Copy the corrected text into a new Word document.

Change the Page Layout to A5 Landscape. Adjust the font / font size so it fits reasonably on 3 or 4 pages. Add your name as a footer. That's the first draft required. Save that.

For the presentation, these notes are for PowerPoint. Open a new file and change the Slide Size to A4 landscape.
Choose the Title + Content layout for the first slide.
Type or copy the title (Alice in Wonderland) as a slide title.
Copy chunks of text from the A5 draft you've done to slides. You'll need six or seven to fit it all on, depending on the font size and spacing.
Use the same title for each slide
When all the text has been added there may be different size or spacing on some slides. Adjust each one so that they are the same, moving some text if required.
Add your name as a footer on one or more of the slides
Save that file.

For the newspaper draft, start a new file (A4 portrait as normal)
Paste the text in.
Select it all and use Page Layout / Columns to change it to a three column layout. Justify the text too.
You may have to reduce the font size to make it all fit on a single sheet.
Add the title Alice In Wonderland as a header and your name in the footer.
Save that file.

The next stage is to add images, a header and page numbers to the A5 landscape version you save earlier.
Add 4 images. At least one must be from those supplied. Your text will probably spread over 4 pages so add one image to each page.
In the header, type the title.
In the footer, Use Insert > Page Numbers to add numbers to each page on the bottom right of each page
Add a new first page and type the title there in a large font so that it almost fills the page.
You also need to add some graphics. these are the + - x and ÷ symbols (Lewis Carrol loved numbers!)
These can either be obtained from the internet or you can make them yourself using shapes or Word Art. Each graphic should be set to be wrapped Behind Text. You can position them so that they either appear one per page or all showing on each page. Just ensure that the text is still legible.

To remove the header and footer from the first page, you need the Header and Footer tools which will be available when you Edit Header (if necessary use Insert > Header > Edit Header). On the toolbar there will be a Different First Page option to tick. That will apply to both the Header and the Footer.

Now your page numbers will probably start with 2 on the second page. That looks a bit odd so use Insert > Page Number > Format Page Number and set them to Start at 0. That will make the second page show as page 1.

Add your name to the footer (not showing on the first page).

That completes the second A5 draft. Save the file with a different name.


Assignment 2 Guide (Alice Part II)


Making a Template
Delete the main text (not the title page) and the Alice pictures you had included. Leave the maths symbols.
Save the empty document and choose Word template.

Testing the template.
You will have some random text supplied in a file called ipsumlorem.txt
Open that and copy all the text into your template document, starting on the second page (i.e. leaving the title intact.) It should spread out creating several pages, each with the correct header and page numbers and symbols displayed.
Save that file as a normal Word document with a different name.

More changes to the A5 draft
Some work is necessary on the images you used in the document. If you used the ones supplied then these instructions apply to all of them. You may be able to adjust some other images that you got from elsewhere with similar techniques.

First change the font as required - reduce it and choose a different font.

Transparent background

First make the background of the image (in the case of the supplied images it is white). Make this colour transparent or see-through. Use Picture Tools > Format>Recolor


Use Set transparent Color in this menu


Now, any background should show through.

Shadow
This can be added using either the Picture Format tools (there are some presets available that may be suitable) or you may prefer to make your own effect by editing the image in Serif PhotoPlus, exporting it as a PNG or GIF (to retain the transparency) and the inserting it as a new image.

Wrapping
This is all about how the text moves around an image. Usually, when you first insert an image it is either In Line With Text so that text stops above it and starts again below it, or the image is treated like a Square or rectangle and the text follows straight lines around it.


Right click on an image and select Text Wrapping > Edit Wrap Points.

This will show a red outline with little nodes you can move.

The text will now follow your new outline.

A new cover page

Find a new image that is big enough and suitable for a front cover illustration. You can either set this to be shown behind the existing title text on the front page or edit the image in Serif PhotoPlus and add the text to it. Save this file again with a different name.


The end result could be like this.

And this is what the completed document might look like:


Assignment 2 Guide (Alice Part III)


You can choose any images for a poster. Here, I have used the same one made for the A5 booklet cover as that had a child's handwriting type of font and large letters.

The extracts are simply added as labels and spaced randomly. This was made using Serif DrawPlus. The labels are white rectangles placed behind text boxes containing the extracts. Then they were grouped and rotated a little.

Provided you have a clearly legible poster, A4 size, with uncluttered text and the two elements, an image and the extract(s) then that should be adequate for the first part of the task.

An Invoice
This is totally different. You can use a ready-made template (look in New>Templates>Invoices in Word) or make your own in Word or Excel.

The features to include are your 'firm' name, an address, maybe an e-mail contact address, a made-up customer's name and address and it's a good idea to have the word INVOICE clearly stated at the top.

Then you list the seven main documents you will have prepared so far and add a few notes about how you did them (what software you used and what size they are). If you're not using a spreadsheet, this is best put in a table with one row per document.

The seven documents will be:
  1. A5 1st Draft
  2. A4 Newspaper
  3. A4 Presentation
  4. A5 2nd Draft (with images)
  5. A5 Template with random / designer text
  6. A5 3rd Draft (with edited images and new cover)
  7. A4 Poster


Save a version with the details and your descriptions.

You then need to add some more information to each of the listed tasks. In a spreadsheet, just use the next columns. In this template I was able to change the existing column headings. You may have to add two columns to an original Word table. Whichever method you've used, the two new columns are File Size and Price.

You can get the File Sizes (in KB) from your folder view for the 7 files.

The Price is £2 per KB so multiply the file size by 2. In Excel you can use a formula. In a Word table you can also use a formula but it's trickier! Or just use your head or a calculator!

A Total Price is needed and then a VAT figure, 20%, or 1/5th of the Total price.

Finally, add the Total price and VAT to get the amount due

Again all these figures can be calculated easily in a spreadsheet (not quite as easily in a Word table) or just work them out and enter them.

Save the revised invoice with a different name.

(The illustration below includes the two extra columns needed for the last task)


A chart
This is quite straightforward. Put the task name and file size as headings for two columns in a spreadsheet. (If you used a spreadsheet for the invoice, use that file). Enter the data in the rows below. Select all the data and use Insert>Chart and choose a Pie Chart.

You may prefer to change the colours and you should add labels to show the file sizes and a legend to explain which sections are which.

Add a title like How The Total Cost Is Made Up.


The small chart made by default should be moved to its own sheet. Right click on the chart to get a menu to choose this option from.

Save the file

A PDF document
The final tasks is to produce one PDF document that contains the poster, the chart and the invoice. This could be a Word document with each item as a separate page. Or you could use three sheets of a Workbook - that's simpler if you have used a spreadsheet for the invoice.

If you use the workbook with the chart, on a new sheet add an image of the A4 poster. You may have to take a screen print of a Word page to get this.

If you didn't use a spreadsheet for the invoice then you'll need an image of that too. Again, a screen print may do. (Crop screen prints down to just the documents in each case).

One way or another, you'll now have three sheets in a spreadsheet file or three pages in a Word file with what are required. Use File>Save As and choose PDF. This will create a single file with the three individual pages.


Depending on the dimensions of each element, some adjustments may be needed to get the best display.


Monday 7 November 2011

Leaflet requirements for small business clients

P F Carpentry


Peter’s web site can be viewed at andrewx.com/pfc/ where you can see more information about his work.

A leaflet about his services should feature
  • pictures of timber construction and/or carpentry tools 
  • an oak tree 
  • his business title ‘P F Carpentry’ 
  • his contact details 
  • the address of a proposed new website pf-carpentry.com 
headings and some text from his old website for About Peter, Indoor, Outdoor and Customers

It should use browns and greens as the predominant colours (although small text can be black or white for clarity)


Judy Melissa Harrison

Judy’s web site can be viewed at judyharrison.co.uk where you can see more information about her work.

A leaflet about her services should feature
  • pictures of flowers, calm landscapes, sea or sky scenes 
  • a waterlily 
  • her business title ‘Judy Melissa Harrison’ 
  • her contact details 
  • the address of her current website judyharrison.co.uk
  • headings and some text from her website for each of hypnosis, stress, smoking, reiki and past lives 

It should use light purples and teal or turquoise as the predominant colours (although small text can be black or white for clarity)